
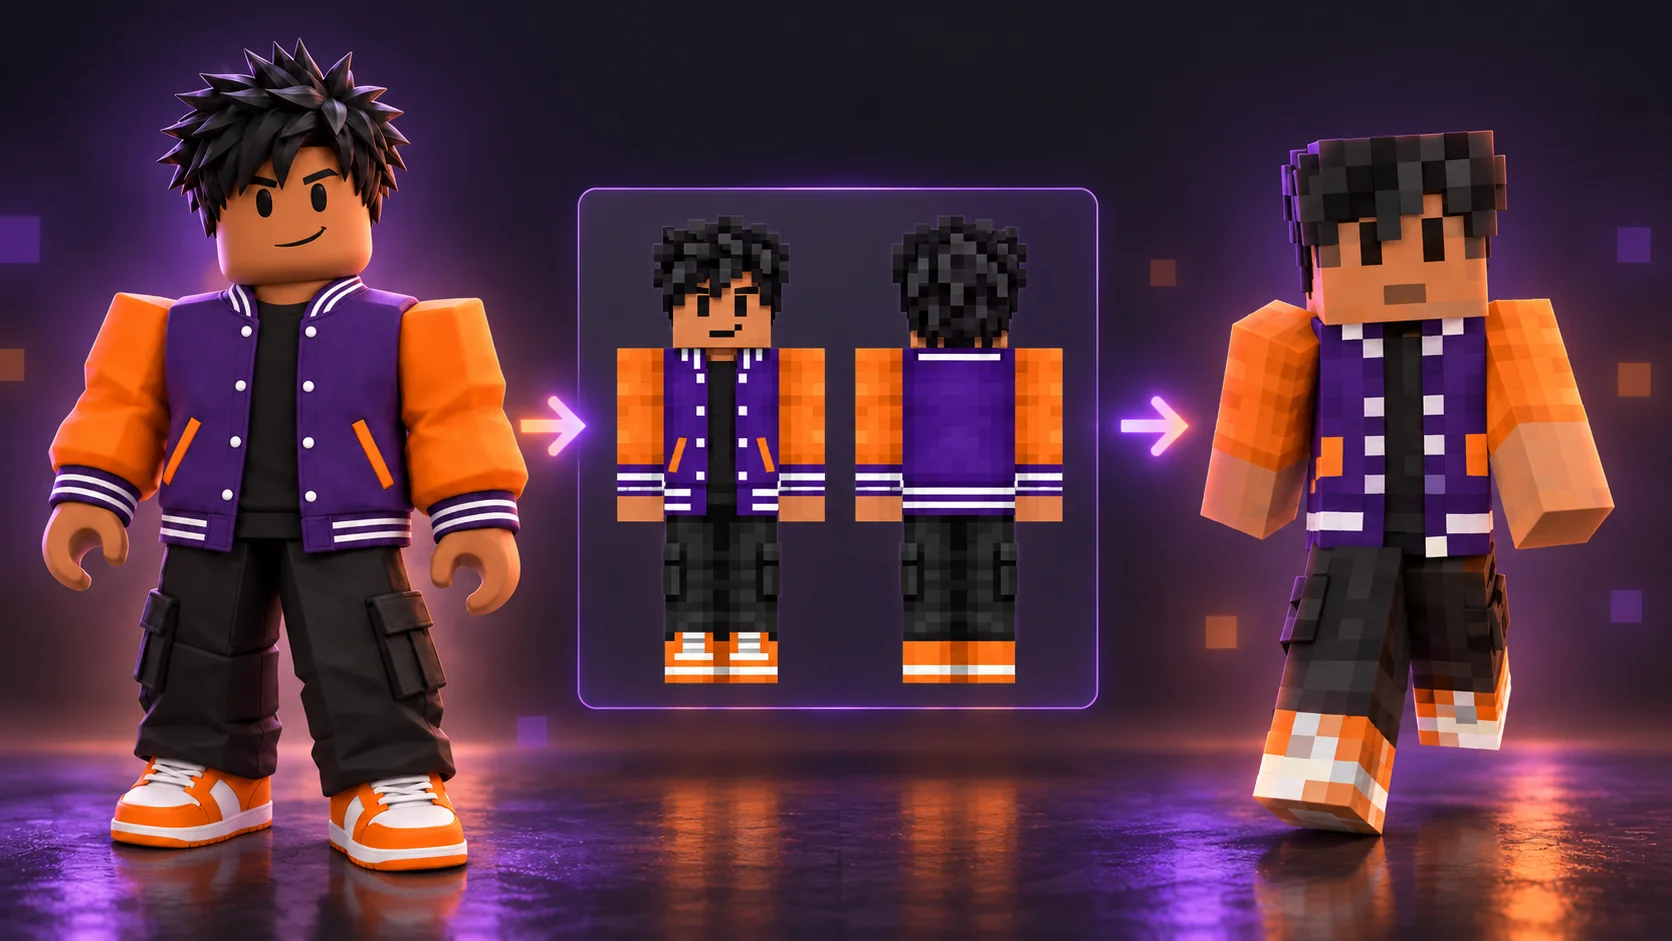
You can turn a photo into a Minecraft skin with ImagineGo’s AI Minecraft Skin Generator. Choose Photo To Skin, upload your image, inspect the generated character in the 3D preview, and download the 64×64 PNG skin with Classic/Steve arms.
The file you need is an unwrapped skin texture, with pixels arranged for the head, body, arms and legs. A screenshot or a picture of a Minecraft character is a different kind of image. This guide walks through the conversion, checks before downloading, and installation in the game.
Can an AI-generated Minecraft character image be used as a skin?
A character illustration cannot be imported directly as a standard Minecraft skin. Minecraft needs a texture laid out across the character’s surfaces. Its official skin guide explains that Java skin imports use a flat, unwrapped PNG aligned to the player model.
ImagineGo provides three modes. Pick the one that matches what you want to do:
| Mode | Starting point | Result | Use for this tutorial? |
|---|---|---|---|
| Photo To Skin | Uploaded photo or character image | 64×64 Classic skin PNG | Yes—this is the image-upload workflow |
| Text To Skin | Written character description | 64×64 Classic skin PNG | Useful when you have an idea without a photo |
| Concept image | Uploaded image and creative instructions | Character concept image | Use for artwork, not direct skin import |
Photo To Skin first creates front and back character views, then converts those views into an unfolded skin texture. The downloadable skin is the final texture, rather than the intermediate character image. You can see these stages in the tool’s public example.
How to turn your photo into a Minecraft skin
1. Choose a clear reference image
Use a well-lit picture with one main subject, visible hair and clothing, and a face that is easy to see. A front-facing photo is a practical starting point. If your outfit matters, include more than a tightly cropped face.
The current upload control accepts PNG, JPG and WebP images up to 10 MB. You do not need to resize the input to 64×64: that is the output skin size. Use a photo you own or have permission to upload, especially when it shows another person.
Think about which details make the character recognizable. Hair color, a jacket’s main colors and distinctive shoes translate more clearly into a small pixel texture than tiny lettering or subtle facial detail. A photo of someone’s front also leaves their back unseen; describe important missing details if needed.
2. Select Photo To Skin and upload your image
Open the photo-to-Minecraft-skin tool, select Photo To Skin, and upload your reference.
3. Add a short instruction about what to preserve
The optional prompt is useful for appearance choices, rather than file-format instructions. The workflow handles the skin layout. Keep your instruction focused on a few visible features:
Keep my dark curly hair, warm skin tone and green hoodie.
Use dark trousers and white trainers. Keep the back of the hoodie
plain green. Simplify small details into readable Minecraft pixels.
For a stylized outfit variation:
Keep the hairstyle and main outfit colors from my reference.
Turn the outfit into a simple forest adventurer look with a green
jacket and brown boots. Keep the face visible and avoid tiny text.
Keep the prompt focused on the hairstyle, clothing colors and other visible features you want to preserve.
4. Generate and inspect the actual skin
Start generation once your image has uploaded. Conversion can take a few minutes; it includes more than creating a single illustration. Wait for the completed skin rather than treating an intermediate front/back image as the finished download.
Inspect the character’s front, back and sides in the preview. Rotate it and look at the shoulders, wrists, waist and shoes. Check whether sleeves connect sensibly, the back matches the front, and the hair and outfit still communicate your intended look.
If the idea is right but a small detail needs adjustment, use the free Minecraft Skin Editor to edit individual pixels and export a PNG. A minor color correction may be easier to fix manually than by requesting a new AI interpretation.
5. Download the skin PNG
Choose Download skin PNG and keep the original 64×64 file. Do not substitute a screenshot, the uploaded reference, or the front/back character illustration. Enlarging the texture for display does not improve its import compatibility.
ImagineGo’s generated skin uses Classic/Steve arms. Select Classic/Wide in Minecraft Java Edition, and the matching wide-arm model when importing on a supported Bedrock device.
A published example: reference image to downloadable skin
The following example is a Roblox-style character wearing a purple varsity jacket with orange sleeves, dark trousers and orange shoes. It is a character-reference example of the same Photo To Skin workflow used for uploaded photos.
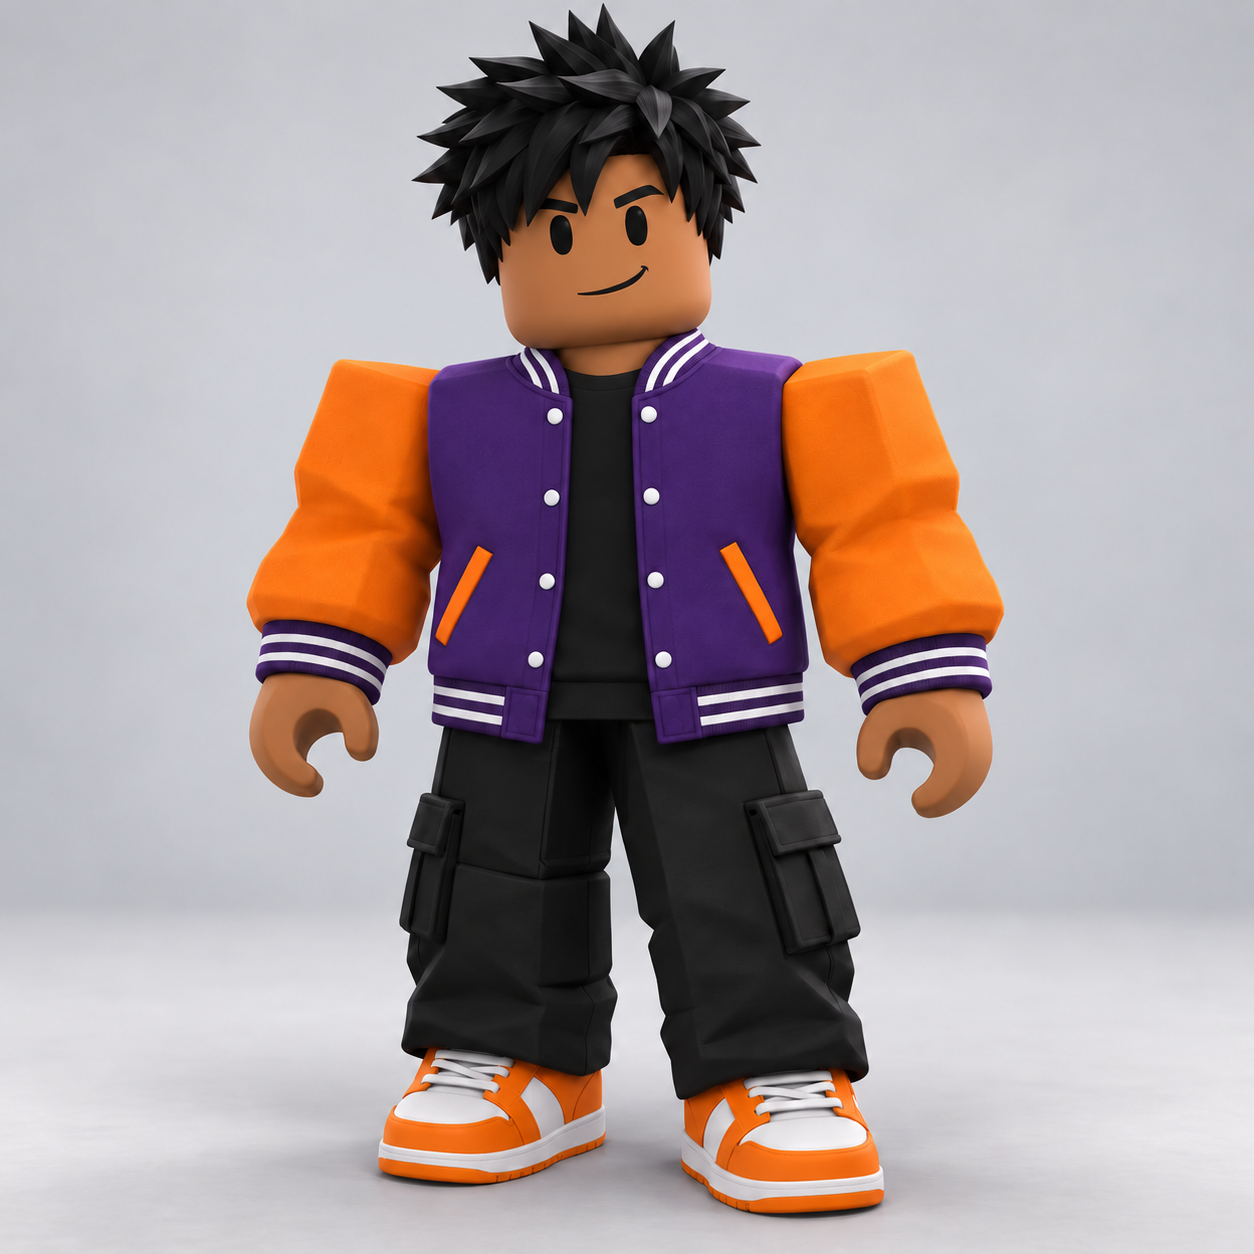
Original character reference from ImagineGo’s published example. This is an avatar image, not a photograph of a person.
The cover is an AI-generated illustration of the workflow, not an actual conversion result. The real published example’s front/back views below show the intermediate appearance design. They are not the file to import.
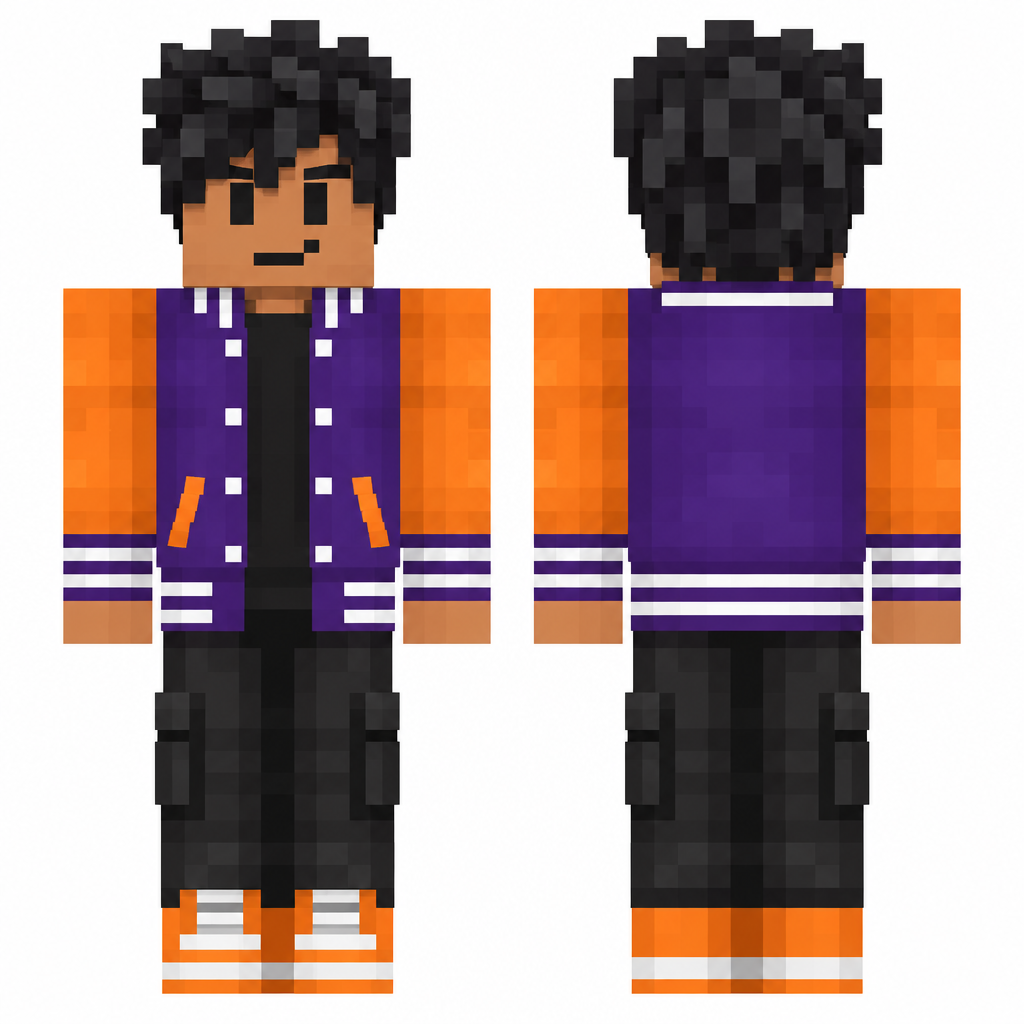
Actual front/back appearance views from the published character-reference example. The downloadable skin is the unfolded PNG below:

Download the actual sample skin PNG, or inspect it in the interactive public example. The texture is intentionally only 64×64 pixels; preserve that size for import.
Explore the sample skin in 3D
Rotate this actual sample skin to inspect the jacket, hair, sleeves and shoes from every side. Choose Front or Back, drag the rotation slider, or enable Walk to see the texture on a moving Classic-arm character. This preview uses the downloadable skin PNG, rather than the front/back concept artwork.

Loading the 3D skin preview…
Edit your skin and switch between wide and slim arms
Open ImagineGo’s Minecraft Skin Editor to refine your generated skin or an existing skin PNG. You can paint individual pixels, adjust hair and outfit colors, clean up sleeve edges, preview the character in 3D, and export the edited skin PNG without another AI generation.
The editor also lets you switch the arm model between Classic/Steve (wide arms) and Slim/Alex (narrow arms) using the Toggle skin model control. Classic arms are four pixels wide; Slim arms are three pixels wide. Use the editor to adapt the skin for the arm model you prefer:
- Open the editor and import your downloaded skin PNG. When opening the standalone editor, import your own file to replace the example skin.
- Edit the face, hair, clothing or other details with the pixel tools.
- Use Toggle skin model to switch between Classic and Slim.
- Rotate the 3D preview and inspect both arms, especially the sleeve fronts, sides and shoulders. Switching the model changes how the texture is mapped; touch up arm pixels if necessary.
- Export the edited PNG and select the same arm model when importing it into Minecraft.
The generator’s original download uses Classic arms. If you edit it for Slim arms, choose Slim at import instead of the Classic/Wide setting used elsewhere in this guide. Simply changing the selection in Minecraft does not automatically adapt an unedited Classic texture.
Edit your Minecraft skin and choose its arm model.
Which Minecraft editions can use the downloaded PNG?
Compatibility depends on the device as well as the edition. Minecraft’s Character Creator FAQ confirms custom skin importing on Windows and mobile and states that console skin importing is not supported.
| Where you play | Custom PNG import | What to use |
|---|---|---|
| Java Edition on Windows, macOS or Linux | Supported | Launcher skin import; Classic/Wide for ImagineGo’s output |
| Bedrock Edition on Windows | Supported | Dressing Room’s Classic Skin import options |
| Bedrock Edition on Android or iOS | Supported | Classic Skin import from a file available on that device |
| Bedrock Edition on Xbox, PlayStation or Nintendo Switch | Not officially supported | Available built-in customization or Marketplace skins |
Downloading a PNG on your phone does not create a console-import option. Do not assume that using the same Microsoft account transfers a custom imported skin to a console; the official FAQ also says imported Bedrock custom skins do not sync between devices.
Import into Minecraft Java Edition
Minecraft’s official Java import instructions describe this process:
- Open Minecraft Launcher and select Minecraft: Java Edition.
- Open Skins, then choose New Skin.
- Name the skin and select Classic/Wide for ImagineGo’s output.
- Use Browse to select the downloaded skin PNG.
- Choose Save & Use, then check your character in the game.
Matching the arm model matters. Selecting Slim for a texture designed for Classic arms can make the arms look incorrect even when the file’s dimensions are right.
Import into Bedrock on Windows or mobile
Minecraft’s official skin overview distinguishes Classic Skin from the item-by-item Character Creator. On a device that supports custom PNG importing:
- Save the downloaded PNG somewhere the game can access on that device.
- Open Dressing Room and select a character slot to create or edit.
- Choose the Classic Skin section, then its custom-skin import option.
- Select the PNG and choose the model matching its Classic/wide arms.
- Return to the game and inspect the appearance.
Menu wording can vary by version. Look for the custom-skin import control within Classic Skin rather than the controls for selecting individual hair or clothing items. If you are playing on a console, changing the PNG does not remove that platform restriction.
Check these five things before calling a skin finished
Use this checklist to separate “looks like Minecraft” from “ready to try in Minecraft”:
- File: The download is an actual PNG texture, not a screenshot or an illustration renamed with a .png extension.
- Dimensions: ImagineGo’s final skin remains 64×64 pixels.
- Layout: The unfolded texture maps sensibly onto the 3D character, including its back and sides.
- Arms: The import model matches the Classic/Steve texture.
- Device: Your edition and device support custom PNG imports, and you have checked the result in-game.
These checks serve different purposes. Correct dimensions help with compatibility; inspecting the mapped character helps with appearance. A 64×64 image alone is not proof of a well-designed skin.
Common problems and what to check next
| Problem | First check | Next action |
|---|---|---|
| You downloaded a large character picture | Output mode and selected file | Use Photo To Skin and download the final skin PNG |
| The arms look wrong | Classic versus Slim | Import ImagineGo’s result with Classic/Wide arms |
| Front looks good, back looks different | Generated back view and texture | Clarify missing outfit details or edit the back manually |
| Face resembles the photo only loosely | Input framing and visible identity cues | Use a clearer reference and prioritize hair, colors and clothing |
| PNG is rejected | Actual format, dimensions and device | Keep the original file; confirm custom skin import is supported |
| A console has no working import control | Platform compatibility | Use console-supported customization instead of retrying conversion |
Is AI conversion different from a free image-to-skin converter?
Yes. The useful distinction is how the tool constructs the texture. ImagineGo generates a character interpretation and then converts it into a skin layout. An image-mapping converter places parts of an existing image onto that layout, often with crop and fit controls.
For example, MineUtils’ image-to-skin converter describes a free browser workflow that maps an uploaded image to a skin, lets you adjust the fit, and offers preview and PNG download. That is an alternative to investigate if you want to arrange an image yourself.
Choose based on the job: AI interpretation is useful when you want a redesigned blocky character; manual mapping or pixel editing is useful when you want direct control over the texture. Whatever tool you choose, inspect the back and sides and verify its exported file before relying on it in-game.
Frequently asked questions
Can ChatGPT make a Minecraft skin from my photo?
ChatGPT can help you describe your appearance, choose a style or write a conversion prompt. If an image tool gives you a normal character picture, that picture still needs conversion into the game’s skin layout. Check the delivered PNG, its dimensions and its mapped appearance before treating any generated image as a usable skin.
Can I edit and download my skin?
Download the completed skin PNG, or open it in the skin editor to adjust its colors, details and arm model. Manual editing and PNG export are free.
Can I get a Slim/Alex skin from ImagineGo’s photo conversion?
The current Photo To Skin output is Classic/Steve. To adapt it for Slim/Alex, import the skin into ImagineGo’s Minecraft Skin Editor, switch the arm model, inspect and touch up the arm texture, then export the edited PNG. Select Slim when importing that edited skin into the game. For the original unedited download, choose Classic/Wide.
Will it reproduce my face exactly?
No exact likeness is promised. A small pixel texture simplifies a face considerably, and AI must interpret details absent from the reference. Hair, outfit colors and recognizable accessories are practical details to review.
Does this work with Roblox character images too?
Yes—the published varsity-character example above uses that workflow. It demonstrates a downloadable character-reference conversion, rather than proving results for every Roblox image or every real-person photo. For avatar screenshots, outfit details and accessories, follow our Roblox skin to Minecraft skin converter guide.
Make a skin you can inspect, download and try in Minecraft
Start by checking your device’s import support, then try the public sample if you want to verify the installation steps. For your own appearance, open ImagineGo’s AI Minecraft Skin Generator, choose Photo To Skin, upload a clear reference and review the generated skin. Download the 64×64 PNG, choose Classic/Wide on import, and inspect your character in the game.
Create your own Minecraft skin
Upload a photo to create your skin, or edit an existing skin for free.