
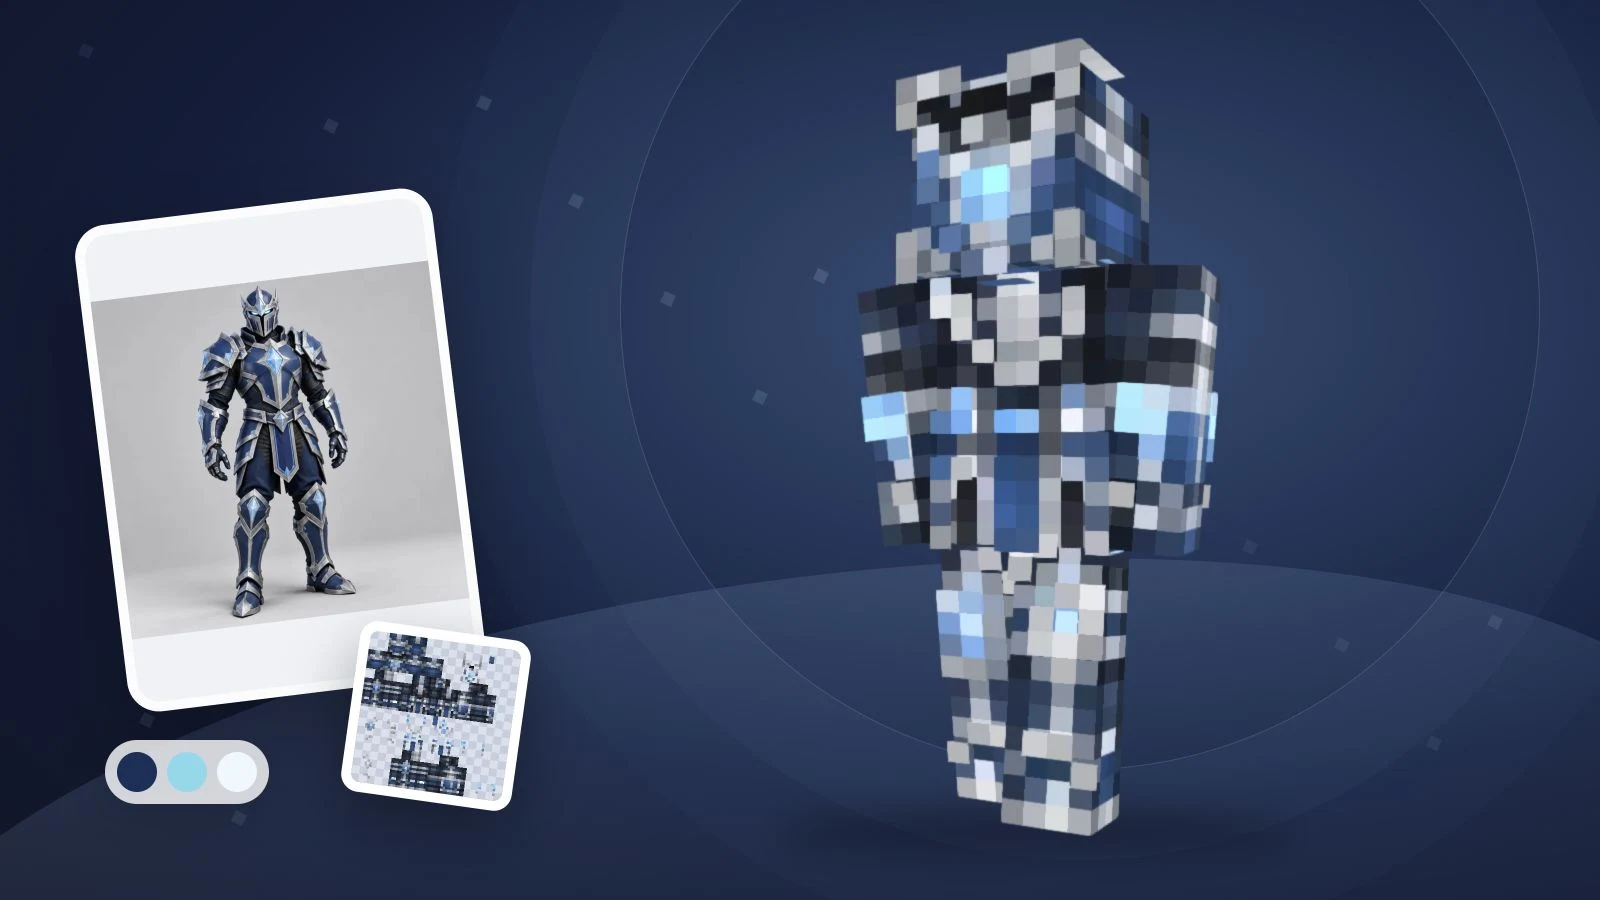
To create a Minecraft skin with AI, describe one character’s appearance, generate the skin, inspect it in 3D, and download the PNG. Start with a role, a small color palette, the outfit from head to shoes, and one detail for the back. ImagineGo’s Text To Skin mode supports this workflow.
If your search was “skin minecraft prompt with ai,” the examples below are designed for that task: turning an idea into a character description you can actually use. They are original, editable starting points, not tested output guarantees. You do not need a photo to use Text To Skin.
The important distinction is the final file. A character illustration is useful for reviewing the look, but Minecraft imports need an unfolded PNG texture mapped to the player model. ImagineGo’s current workflow produces a 64×64 Classic/Steve skin PNG, which you can inspect in 3D and edit before trying it in the game.
A reusable formula for Minecraft skin prompts
Write a character description rather than a request for a cinematic illustration. This template separates appearance choices so you can change one part without replacing the entire idea:
A [role or original character] with [hair and visible face details],
wearing a [main color] [top], [color] [trousers] and [color] [shoes].
Add [one simple accent]. Keep the back [specific color or pattern].
Use clear Minecraft pixel details and keep the face visible.
The template is an editorial starting point, not a special command syntax. The tool handles the skin layout; your description supplies the appearance. The current text model mirrors limbs, so add asymmetric sleeve or leg details manually in the editor. Keep instructions within the current text field’s 500-character limit.
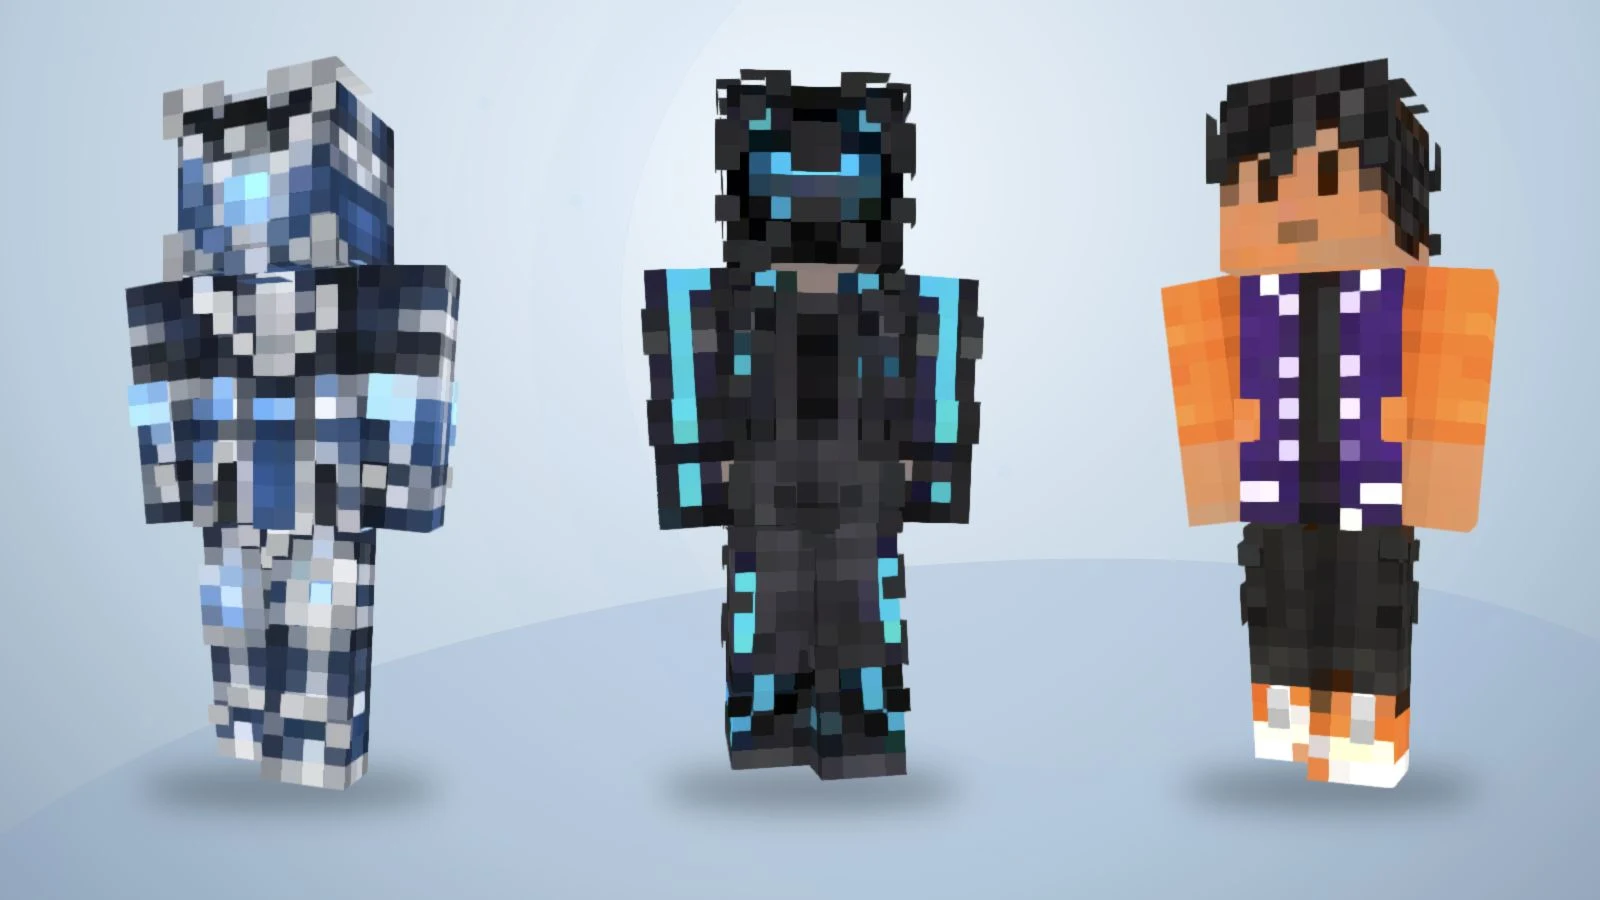
Existing example textures rendered in 3D to show different palettes and outfits. They are not outputs generated from the twelve prompts below.
“A cool explorer” leaves almost every clothing and color choice open. “A forest cartographer with chestnut hair, a moss-green jacket, cream shirt, brown trousers and dark boots” gives the generator a more specific design brief. Adding “keep the jacket back plain green” also makes your intended back design explicit.
Three practical choices make the description easier to review:
- Name the main colors. Give the jacket, trousers and shoes their own color instead of relying on a broad mood word.
- Prioritize recognizable details. Choose a scarf, cuff color or chest patch as the signature accent rather than listing many small accessories.
- Describe both sides. Specify whether the back continues the front’s colors or uses a simpler design.
These are design recommendations. Check the actual result: AI may interpret a detail differently, simplify it or omit it.
12 Minecraft skin prompts you can customize
Each prompt below describes an original character. Replace the hair, outfit colors or accent to make it yours. Details such as a badge, scarf or helmet are visual texture instructions; they do not grant items, armor, lighting effects or abilities in the game.
1. Forest cartographer
A forest cartographer with short chestnut hair and a visible face,
wearing a moss-green jacket, cream shirt, brown trousers and dark
boots. Add one tan chest patch. Keep the jacket back plain green.
Use clear Minecraft pixel details without lettering.
Customize the jacket and chest patch first. Keeping the larger clothing areas simple gives you specific regions to inspect in the preview.
2. Frost expedition knight
An original frost expedition knight with dark hair and a visible
face, wearing slate-blue armor over a navy outfit, pale-blue cuffs
and charcoal boots. Add a simple white diamond emblem on the chest.
Continue the blue armor across the back. No weapons or lettering.
Treat the emblem as a small geometric accent. Inspect how much of it remains readable in the final texture.
3. Neon city courier
A city courier with short black hair, wearing a charcoal jacket
with cyan sleeve stripes, dark-purple trousers and white shoes.
Keep the face visible and the jacket back charcoal with one cyan
stripe. Use simple pixel shapes, no words and no extra equipment.
Cyan accents suggest a neon color scheme; they do not make the skin emit light.
4. Pastel cloud hoodie
An original character with a short lavender bob, a pale-blue hoodie,
cream trousers and lavender shoes. Add a simple white cloud patch
on the chest. Keep the back pale blue and the face unobstructed.
Use a small, consistent pastel palette with distinct clothing edges.
If the hoodie and trousers blend together, choose a stronger difference between their colors.
5. Desert mechanic
A desert mechanic with short brown hair, wearing a sand-colored
jacket over an orange shirt, dark-brown trousers and black boots.
Add dark cuffs and a small square chest pocket. Keep the back of
the jacket plain sand. No tools in the hands and no small text.
The prompt communicates the role through clothing rather than relying on generated handheld props.
6. Orchard gardener
An orchard gardener with curly dark hair, wearing a mustard shirt,
green overalls and brown boots. Add one red square patch on the
front pocket. Continue the overall straps and green fabric on the
back. Keep the face visible and the outfit readable as pixel art.
Check the front pocket and back straps separately; they are distinct parts of the brief.
7. Lunar station technician
A lunar station technician with silver hair and a visible face,
wearing a white utility suit with navy panels, orange cuffs and
navy boots. Add one orange chest badge. Keep the back white with
a navy center panel. No helmet, floating objects or lettering.
Large suit panels give the design a space theme without asking for complex equipment outside the player model.
8. Midnight scout
A midnight scout with dark-purple hair, a black jacket, charcoal
trousers and black boots. Add a burgundy scarf pattern around the
neck and burgundy cuffs. Keep the face visible and continue the
plain jacket across the back. Separate black and charcoal clearly.
Inspect dark outfits against more than one background so the clothing boundaries remain easy to judge.
9. Copper clockwork traveler
An original clockwork traveler with a copper-colored face and
two teal eyes, wearing a dark-brown coat, cream shirt, charcoal
trousers and copper boots. Add simple copper shoulder panels.
Keep the back of the coat brown. No exposed gears or tiny symbols.
This uses colors and panels to suggest a mechanical character while keeping the requested shapes simple.
10. Autumn academy mage
An autumn academy mage with short auburn hair, wearing a burnt-orange
coat over a cream shirt, dark-brown trousers and tan boots. Add
maroon cuffs and a simple square chest emblem. Keep the coat back
orange and the face visible. No hat, staff, lettering or particles.
The magical theme is an appearance choice. The exported skin does not add a staff or particle effect.
11. Ocean research diver
An ocean researcher with short black hair, wearing a teal diving
outfit with navy side panels, yellow cuffs and navy boots. Leave
the face visible. Add a simple yellow square on the chest and keep
the back teal with navy panels. No fins or separate breathing gear.
Keep any equipment-inspired details painted onto the outfit rather than expecting extra 3D geometry.
12. Violet varsity character
An original varsity character with short black hair, wearing a
violet jacket with orange sleeves, white trim, black trousers and
orange-and-white shoes. Keep the jacket back plain violet. Keep
the face visible and use clean pixel details without letters.
This is a suggested description, not the prompt used to create ImagineGo’s existing public varsity sample.
Pick one design, generate a skin, and inspect the actual mapped texture in the 3D viewer.
How to turn your prompt into a skin on ImagineGo
Choose Text To Skin in ImagineGo’s AI Minecraft Skin Generator. The interface was checked on November 13, 2026.
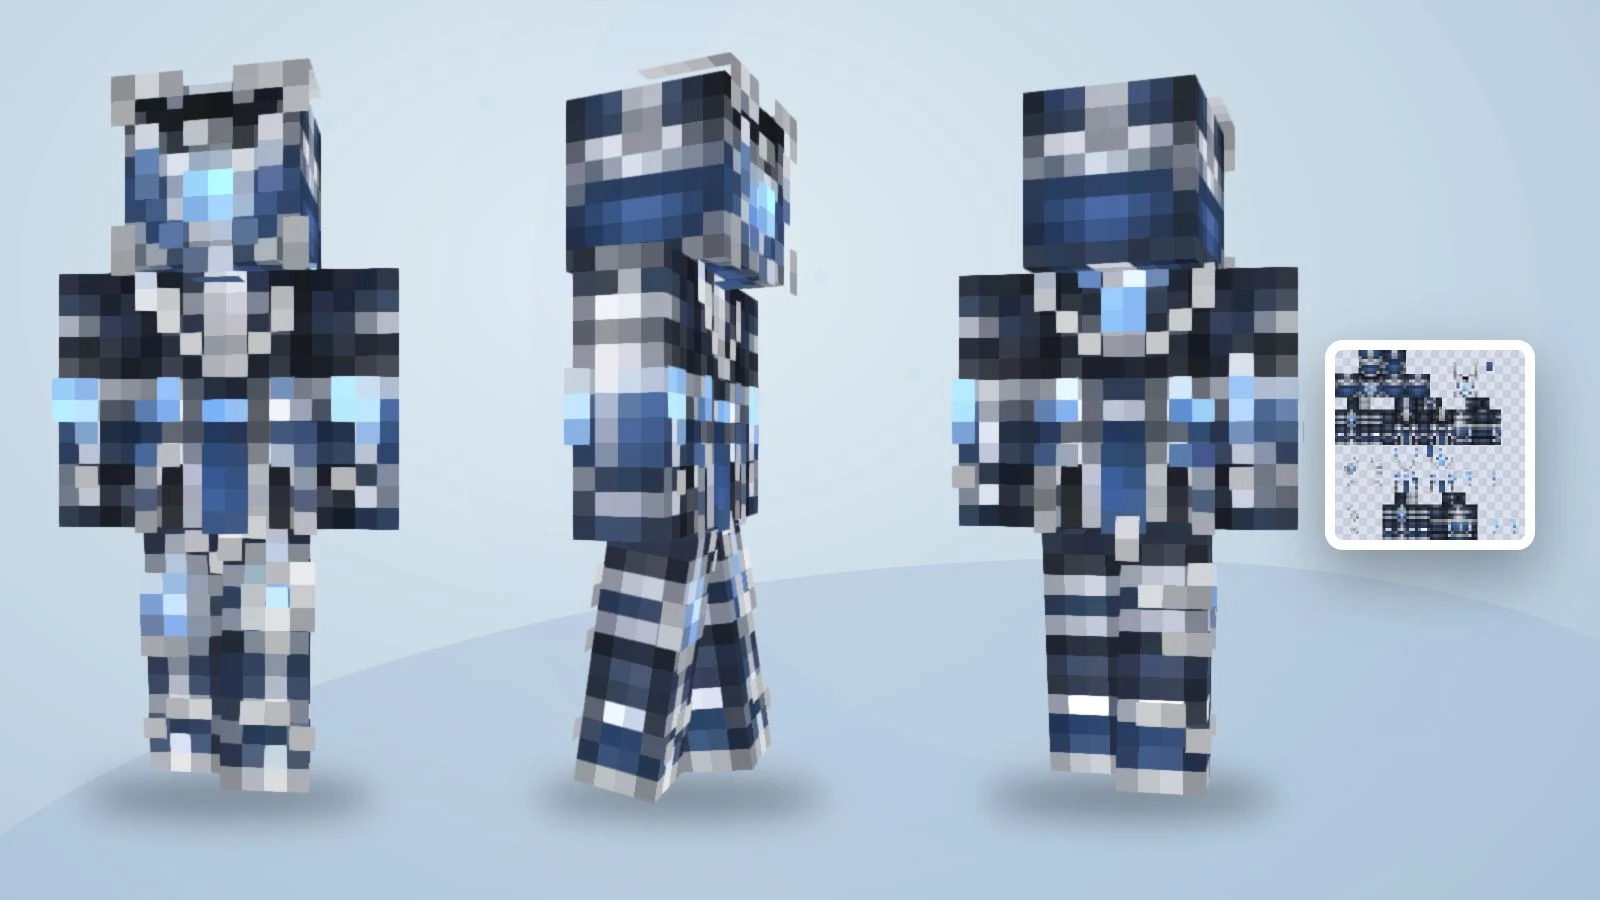
The same existing skin texture, rendered from three angles. This illustrates what to inspect after conversion; it is not an output from the forest cartographer prompt.
1. Choose Text To Skin and enter your description
Use the Text To Skin mode and paste one prompt into Describe your character. Sign in to generate. You do not need to upload an image for this mode.
If you want to start from your own appearance instead, choose Photo To Skin and use a reference you own or are authorized to upload.
2. Generate the skin and inspect it in 3D
Choose Generate my skin. Text To Skin creates the game skin directly, without a separate character-preview or conversion purchase. The current text generation costs 5 ImagineGo credits, as shown before submission. Inspect the finished character’s front, back, sleeves and shoes in the 3D viewer.
The output is a 64×64 Classic/Steve PNG adapted from a legacy 64×32 texture. Left and right limbs are mirrored; writing different sleeve designs does not produce independently generated left and right limb textures in this mode. Use the editor to add those differences manually.
3. Edit details and download the PNG
For a stray pixel or color correction, open the Minecraft Skin Editor. Manual editing and PNG export do not require another AI generation. Change your prompt and submit a new generation when the overall design needs changing; that is a separate paid generation.
Download the skin file rather than a screenshot of the 3D viewer. Choose the matching Classic/Wide model when importing the unedited output.
If you adapt it for Slim/Alex in the editor, inspect and touch up the arms, export the edited PNG, and select Slim for that file when importing. Minecraft’s official skin guide explains the unfolded PNG format and model choice. Custom skin import on Bedrock also depends on your device; its Character Creator FAQ describes the platform limits.
Rotate an example before creating your own
Drag this existing blue knight skin to inspect how the texture wraps around the character. Use Front, Back and Walk to check different views. This is a sample texture, not a new output from one of the suggested prompts.

Loading the example skin…
Fix the description or edit the pixels?
Change the prompt when the overall character is wrong. Use the editor when the concept is right and the remaining issue is a small texture detail.
| What you see | Next action | Example |
|---|---|---|
| The outfit has no clear identity | Specify clothing pieces and colors | Replace “cool explorer” with “green jacket, cream shirt, brown trousers” |
| The back does not match your idea | Describe the back explicitly | “Keep the back plain navy, without a symbol” |
| Too many small details compete | Reduce the brief to one main accent | Keep the scarf; remove the tiny badges and lettering |
| One sleeve or shoe has the wrong pixels | Correct the affected region in the editor | Repaint the cuff without generating the character again |
| You have a character picture rather than a skin | Check the workflow stage and downloaded file | Use Text To Skin and download the final PNG; photo workflows have a separate conversion step |
Frequently asked questions
What makes a useful AI Minecraft skin prompt?
A useful starting prompt identifies one character, names the main clothing colors, describes the outfit down to the shoes, and specifies an important back detail. Keep the result’s small pixel layout in mind, then review the actual skin rather than assuming the description was followed exactly.
Can I make a skin without a photo?
Yes. ImagineGo’s Text To Skin mode starts from a written character description. Photo To Skin is a separate option for people who have an image they own or are authorized to use.
Should I ask the AI for a 4K skin?
For this workflow, the final skin is 64×64. A larger concept image does not replace the required texture layout, and enlarging a PNG does not correct its mapping. Describe the appearance and let the skin workflow handle the export.
Do I need to write the skin’s unfolded layout into the prompt?
No. In ImagineGo’s workflow, your prompt describes the character and the final conversion handles the skin texture. Inspect the exported file and its 3D mapping before using it.
Which tool should I choose?
Compare the workflows if you are still choosing a tool. If you already have a design in mind, start with Text To Skin, inspect the generated skin, and download its PNG.
Create your own Minecraft skin
Describe your character, review the preview, then create a skin you can inspect and edit.